Honda Side-By-Side Axles: OEM Or Aftermarket, Which Are Better?
Sep 15th 2022

The best axles, axle boots, and axle CV joints for the Honda Talon and Honda Pioneer are all hotly contested. Some riders argue that OEM axles are the way to go, while others are confident that aftermarket axles for the Honda Talon and Honda Pioneer are superior. But the term “best” is rather vague, as there’s a big difference between the absolute best Honda UTV axles, and the best axles for the money. Furthermore, the aftermarket modifications you’ve made to your vehicle must also be considered. An axle that works wonderfully on a factory machine might not hold up on a vehicle with a lift kit and heavy mud tires. Plus, putting performance aside for a second, some axles for the Honda Pioneer and Honda Talon are extremely noisy, clicking incessantly and annoying the crap out of those without sound systems loud enough to drown them out. Be it axles with beefier shafts or axles with higher-quality joints, here is our analysis of aftermarket vs factory axles for the Honda Pioneer and Honda Talon!
Honda Pioneer Axles

A lot of Honda Pioneer axle problems occur after lifts are installed. Specifically, the angle created by some Honda Pioneer bracket lifts / spring spacers put the axles at a steeper incline, which then causes the boots to rub themselves apart. Products like forward / arched a-arms can help with this, and so can portal hubs, as they lower the gearing and don’t increase the angle of the axles as drastically as bracket lifts do.
The right axles for you will also depend on the Pioneer model you own. The Honda Pioneer LE edition, for example, utilizes what’s known as I4WD, which senses if one wheel is spinning and then applies more power to the wheels with traction. Because of this, the axles on LE models are different from the other P1K axles.
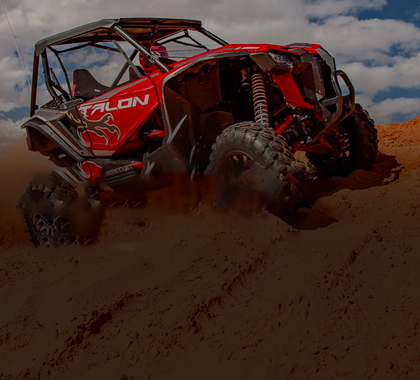
Honda Talon Axles

One of the biggest complaints we’ve seen about Honda Talon axles is how noisey they are. The CV cups are a wear item that get degraded over time from hard use – especially if you ride regularly on blacktop at high speeds. Thankfully, though, replacing the CV joints is a fairly easy project. Rebuilding the CV joints on the stock axles with an aftermarket boot kit should stop them from popping, and keeping them properly greased will also help. To grease the axle joints, simply remove the clamp, slide the boot back, and get in there with a needle-tip grease gun
Best Aftermarket Axles For Honda Side-By-Sides

- Rhino 2.0 Axles: The Rhino axles by SuperATV are affordable axle replacements that have a much beefier shaft than the stock Honda axles. That being said, though, some argue that the CV joints on Rhino 2.0 axles are weaker, and the material used to make the boots is prone to tear. So if you decide to go with Rhino 2.0 axles, we’d suggest also installing some CV boot guards / stick stoppers!
- TrakMotive Axles (regular): These axles have been torque tested to empirically demonstrate 20% more strength than the stock Honda axles. Plus, they’re designed to work at varying angles without any excess friction or unwanted movement.
- Monster XP Series Axles: Monster axles are rated to function at up to 40 degrees, and they slide in and out for unmatched articulation. For rock crawling or rutted-out trails, Monster axles are great!
- Demon Axles: Demon Powersports make a good axle for the Honda Talon, but they don't come cheap! If you‘ve got the coin, you won’t be disappointed with a Demon axle, just be careful not to break something else along your drive train! Demon axles are also common among riders with long travel kits, used in lieu of the axle extensions required when running stock axles.
- Gorilla Axles: Like Demon, Gorilla axles are tough as nails. But again, they’re quite pricey, which is a dealbreaker for many riders.
- Titan Axles: If you want axles that are strong as an ox, Titan won’t disappoint. And because they’re backed with a lifetime warranty, you know that you won’t get stuck on the trail or be forced to constantly replace sub-par parts!
Common Reasons Why Axles Break

It has been noted by many riders that Honda used weak axles on the Pioneer. While that may be the case, you’d probably rather break an axle than your differential or gear box / transmission, so perhaps there’s a reason behind the madness! If you drive conservatively, you can make the stock axles last a lifetime. But even if you’re hard on your machine, there are specific actions that should be avoided so that you don’t keep breaking one axle after another.
A common maneuver that causes axles to break is when riders go heavy on the throttle when the steering is fully turned. Similarly, if your wheels are spinning quickly without grabbing, and then suddenly gain traction, the immediate torque is more than enough to snap axles. More often than not, axle damage can be attributed to drivers hammering down on the accelerator when they shouldn’t be, but this isn’t always the case. And although the five-year extended warranty on axles will cover the first one, it may not cover the second, third, or fourth one if they keep going bad on you!
Replacing Honda SxS Axles & Axle Boots

Regardless of whether you opt for a Turner axle, an Eastlake axle, or a CMI axle, you need to make sure that the axle is level when you pull it out / put it in, or else it’s liable to come apart. This can be difficult if you’re replacing a busted axle in the woods, but in this case, the axle you're removing will already be broken, so it doesn’t matter as much. It is suggested that you use a pry bar between the cup and the differential to remove axles, but be careful when doing this, as you can bust the diff case. Greasing the axles before installing them will also make it easier to remove them if / when the time comes for another replacement!
WhereCV boot replacements are concerned, you need to remove the big CV joint boot clamp in the rear to gain access to -- and take out -- the large snap ring inside the outer edge of the joint. Once that is removed, you can pull the inside cup off, and there will be a snap ring in the center to remove the ball bearing assembly. Pull that off, and then pull the inner CV boot off. Next, slide the outer boot off and install the new one, the just reverse the procedure to reassemble, making sure to grease the joints before putting the boots on!