How To Wire In Your Honda UTV Lights Like A Professional
Nov 15th 2022

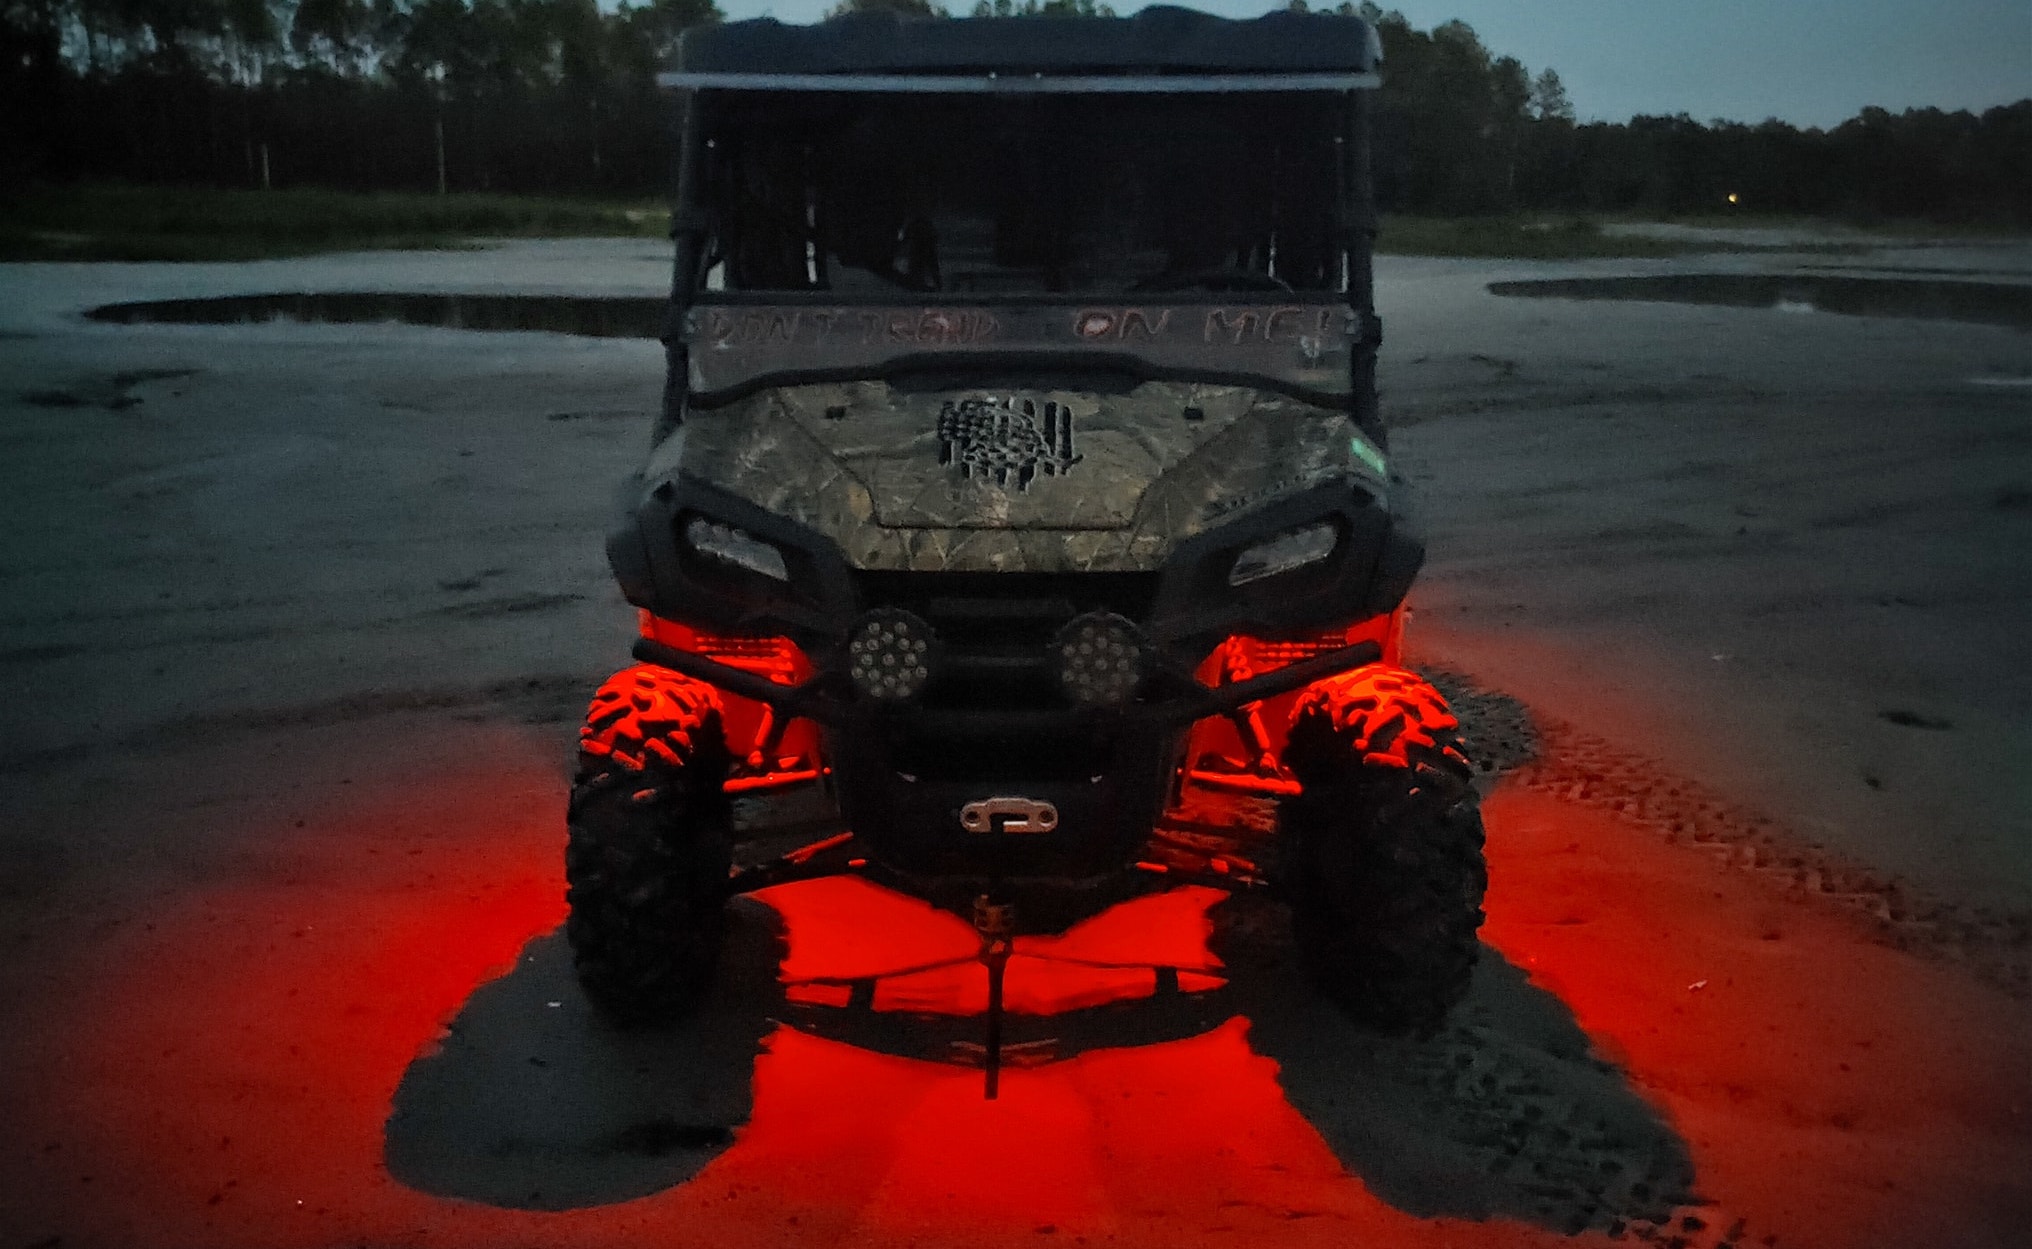
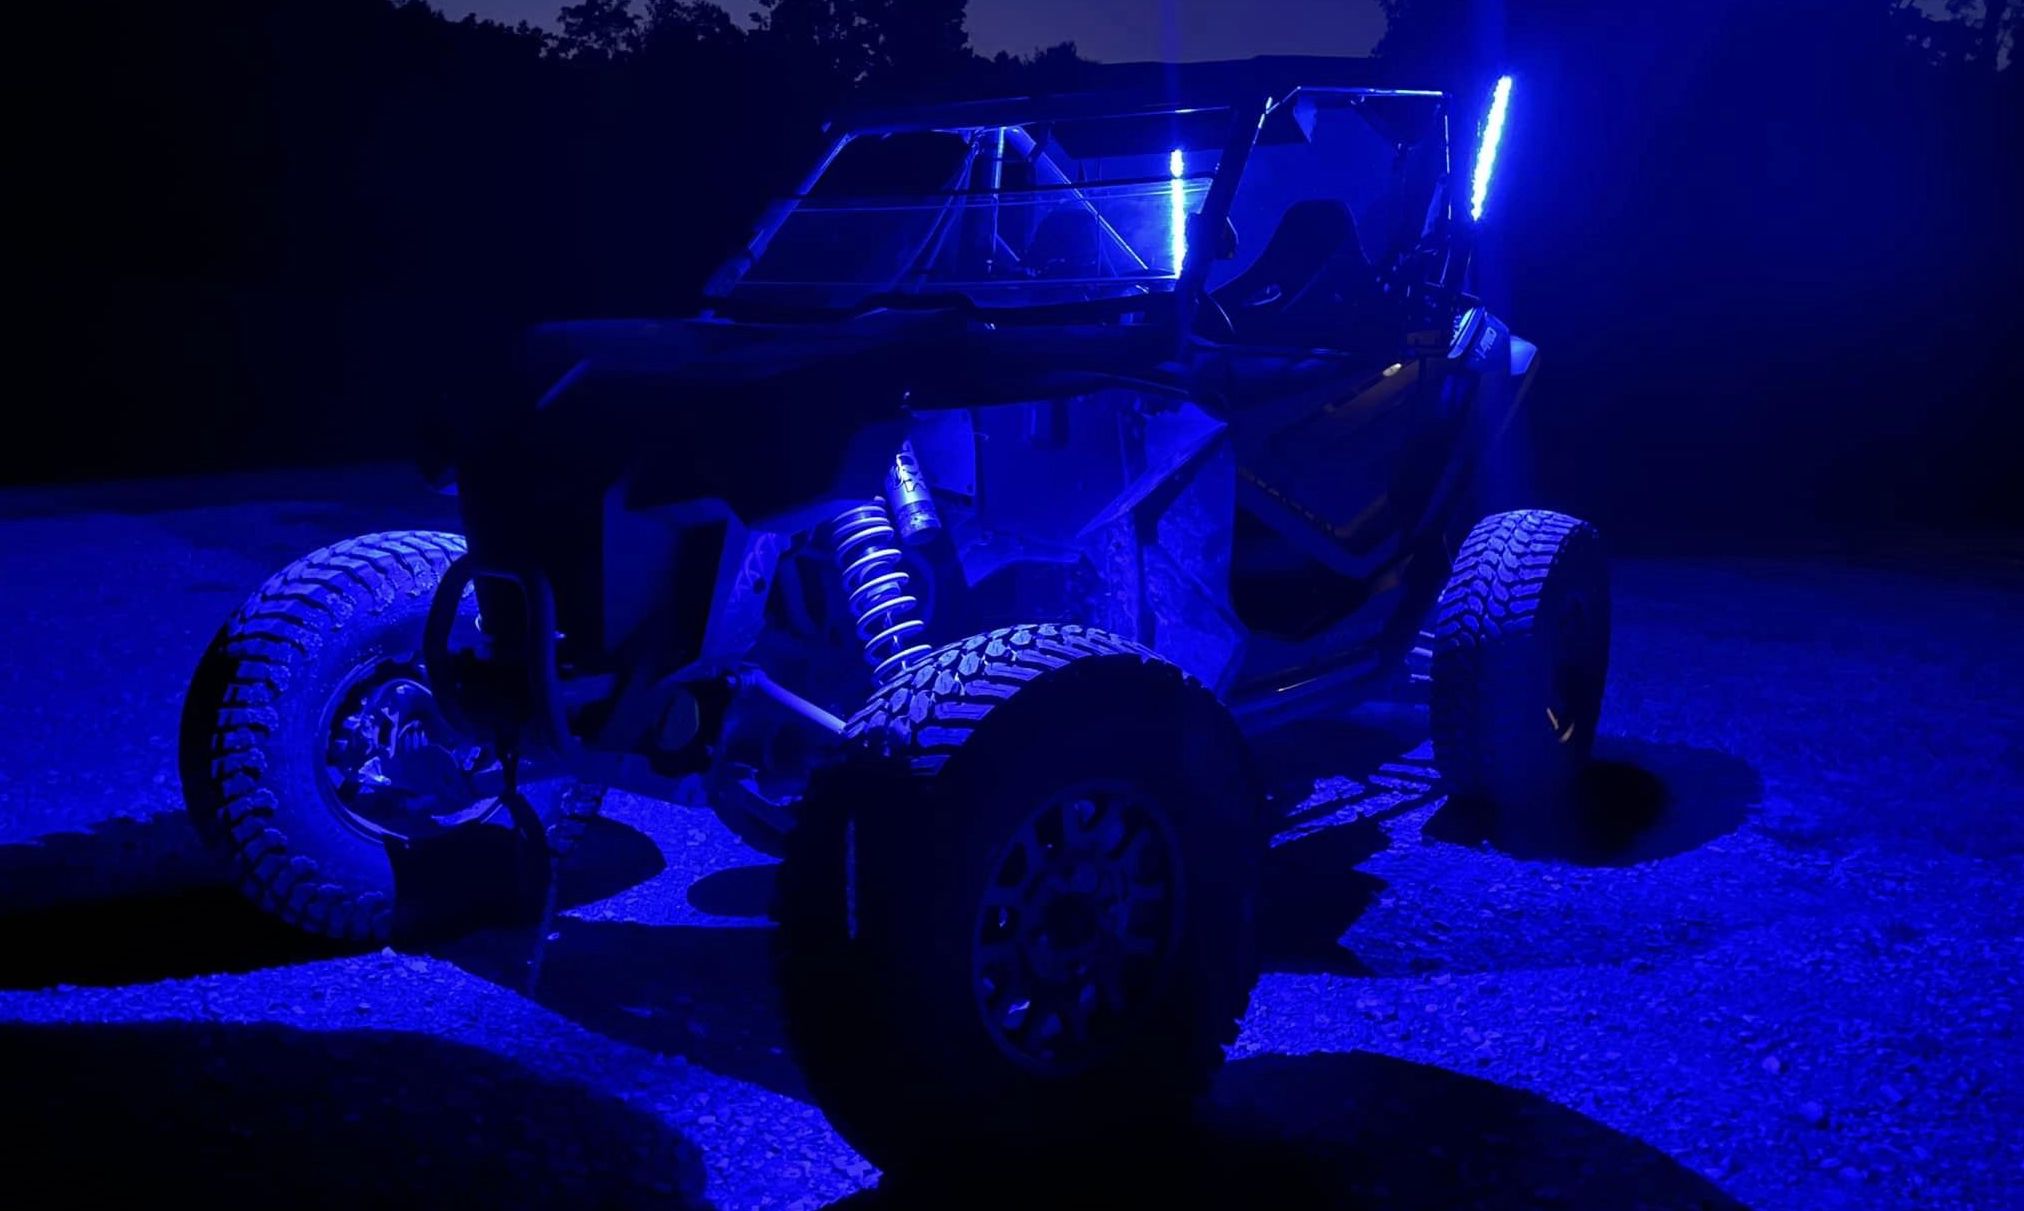
There are multiple ways to hook up lighting accessories in a Honda UTV – some of which being much safer and far more effective than others. Although the fundamentals are pretty basic, there’s a bit more to it than running hot wires to your lights with grounded switches in between. That being said, it isn’t rocket science, and aftermarket electrical parts like bus bars, fuse boxes, power blocks, and pre-configured wire harnesses with built-in relays are available to make it exceptionally easy to install off-road lighting accessories like a pro! Regardless of whether you’re wanting to run a single light bar in your Honda Pioneer that only turns on with keyed power, or rock lights, whip lights, and accent lights in your Honda Talon that will shine bright even when the vehicle is off, here are the best ways to wire up your interior and exterior Honda UTV lighting accessories!
Advice For Wiring Honda Pioneer Lights
If you don't plan on running a bunch of power-hungry accessories, you could go straight to the battery and wire your light switches directly from that – making sure to use in-line fuses of course. But if you’re wanting to power lights, speakers, and other accessories, you’d be better off using something like a distribution block, a bus bar, or a fuse box.
How To Wire A Light Bar On A Honda Pioneer
One way to wire up a Honda Pioneer light bar is to tap into the white and black accessory wire / wire harnesses. You can daisy chain wires together, or you can just pull a fuse out, push the wire in, and then put the fuse back in. Tapping fuses this way isn’t the best method of splicing, however, and it’s much safer, easier, and simpler to use a plug-and-play wire harness.
When tapping into the accessory / 12V wiring for a light bar, you’ve got to be cognizant of the light's draw. Many light bars have a surprisingly-high draw, which can ruin the wiring or pop a fuse. Furthermore, if you tap into a factory wiring harness and something happens to your electrical system, Honda may not cover the damage under warranty. Plus, the last thing you want is a short circuit when you’re out in the middle of nowhere!
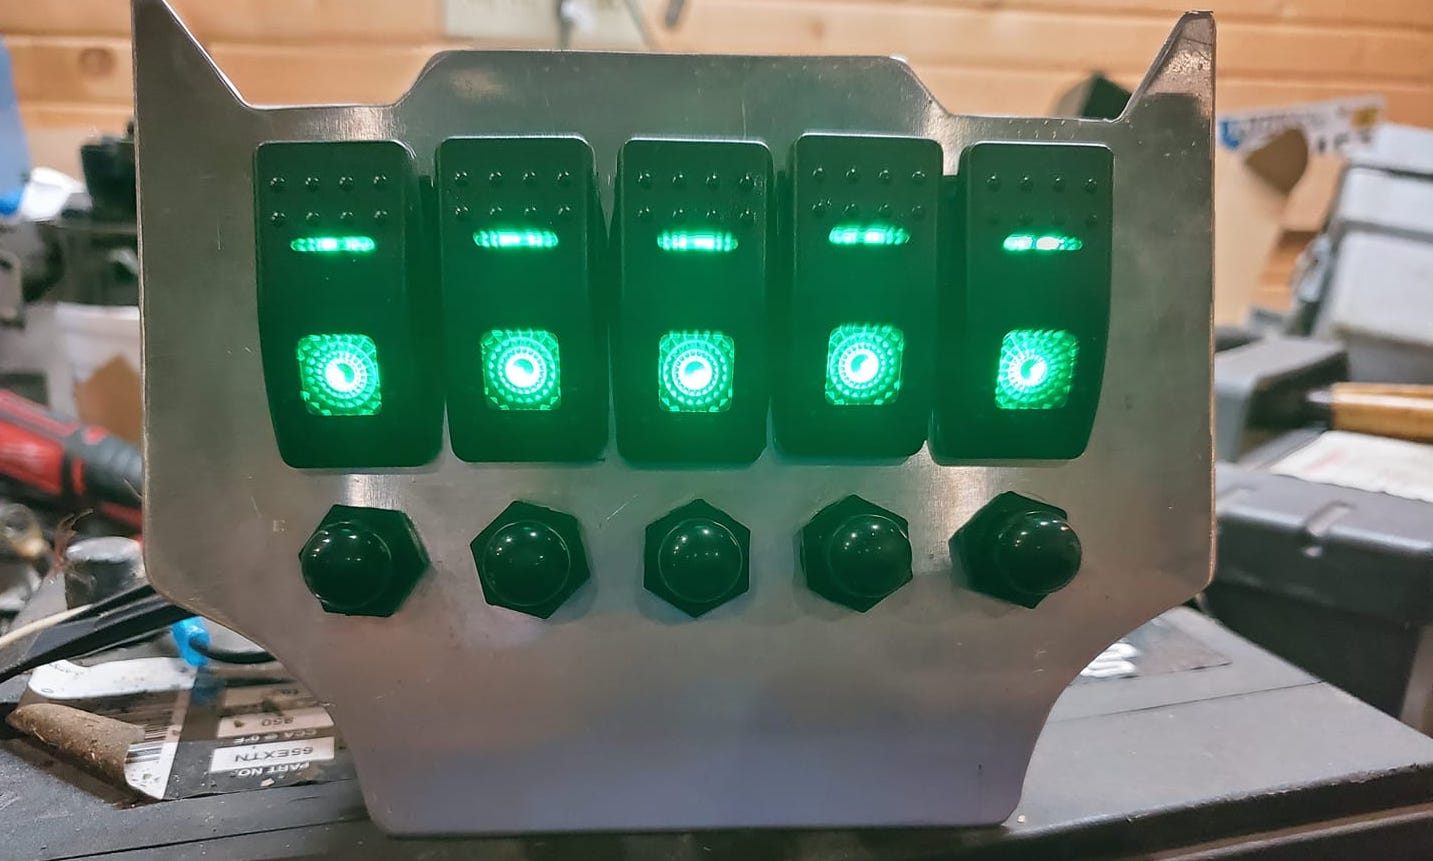
Most Honda Pioneer lights and light bars will come with their own insulated wiring harnesses and in-line relays. So if you tap into the white wire with the black stripe, run that to the first rocker switch, and then daisy chain that same wire to each switch you want to light up, this will only add .02 volts of load to the switch when all your lights are turned on. Honda Pioneer switch panels can be used to make wiring in multiple lights far easier. Switch panels are also handy because of the oversized switches that come stock in the Pioneer. You can use an aftermarket switch panel instead of having to get proper-sized switches that are specialty-made to pop into the factory rocker switch locations.
Rather than wiring your light bar to a switched power source like the cigarette lighter, rewiring the switch so that the illumination circuit is on switched power -- or running relays off the ignition circuit so that your lights only come on with the key -- you could also connect your light bar straight to the battery with its own relay. But if you don’t hook everything to a keyed on/off fuse block, you run the risk of depleting your battery if you forget to turn your lights off.
How To Wire Reverse Lights On A Honda Pioneer
Because there is a gray plug / two-pole connector on the frame of the Pioneer just above the right rear tire, it’s super easy to power aftermarket back-up lights. You can order a pre-configured pigtail that fits the factory plug onto which your reverse lights can be wired, or you can wire up a ground to a 3-position toggle switch – running the ground wire from the reverse plug ground to the toggle ground and then to the lights from the toggle – and power your lights with a wire straight from the reverse plug. Then, instead of having to control everything yourself, your backup lights will turn on automatically when you put your rig in reverse!
Advice For Wiring Honda Talon Lights
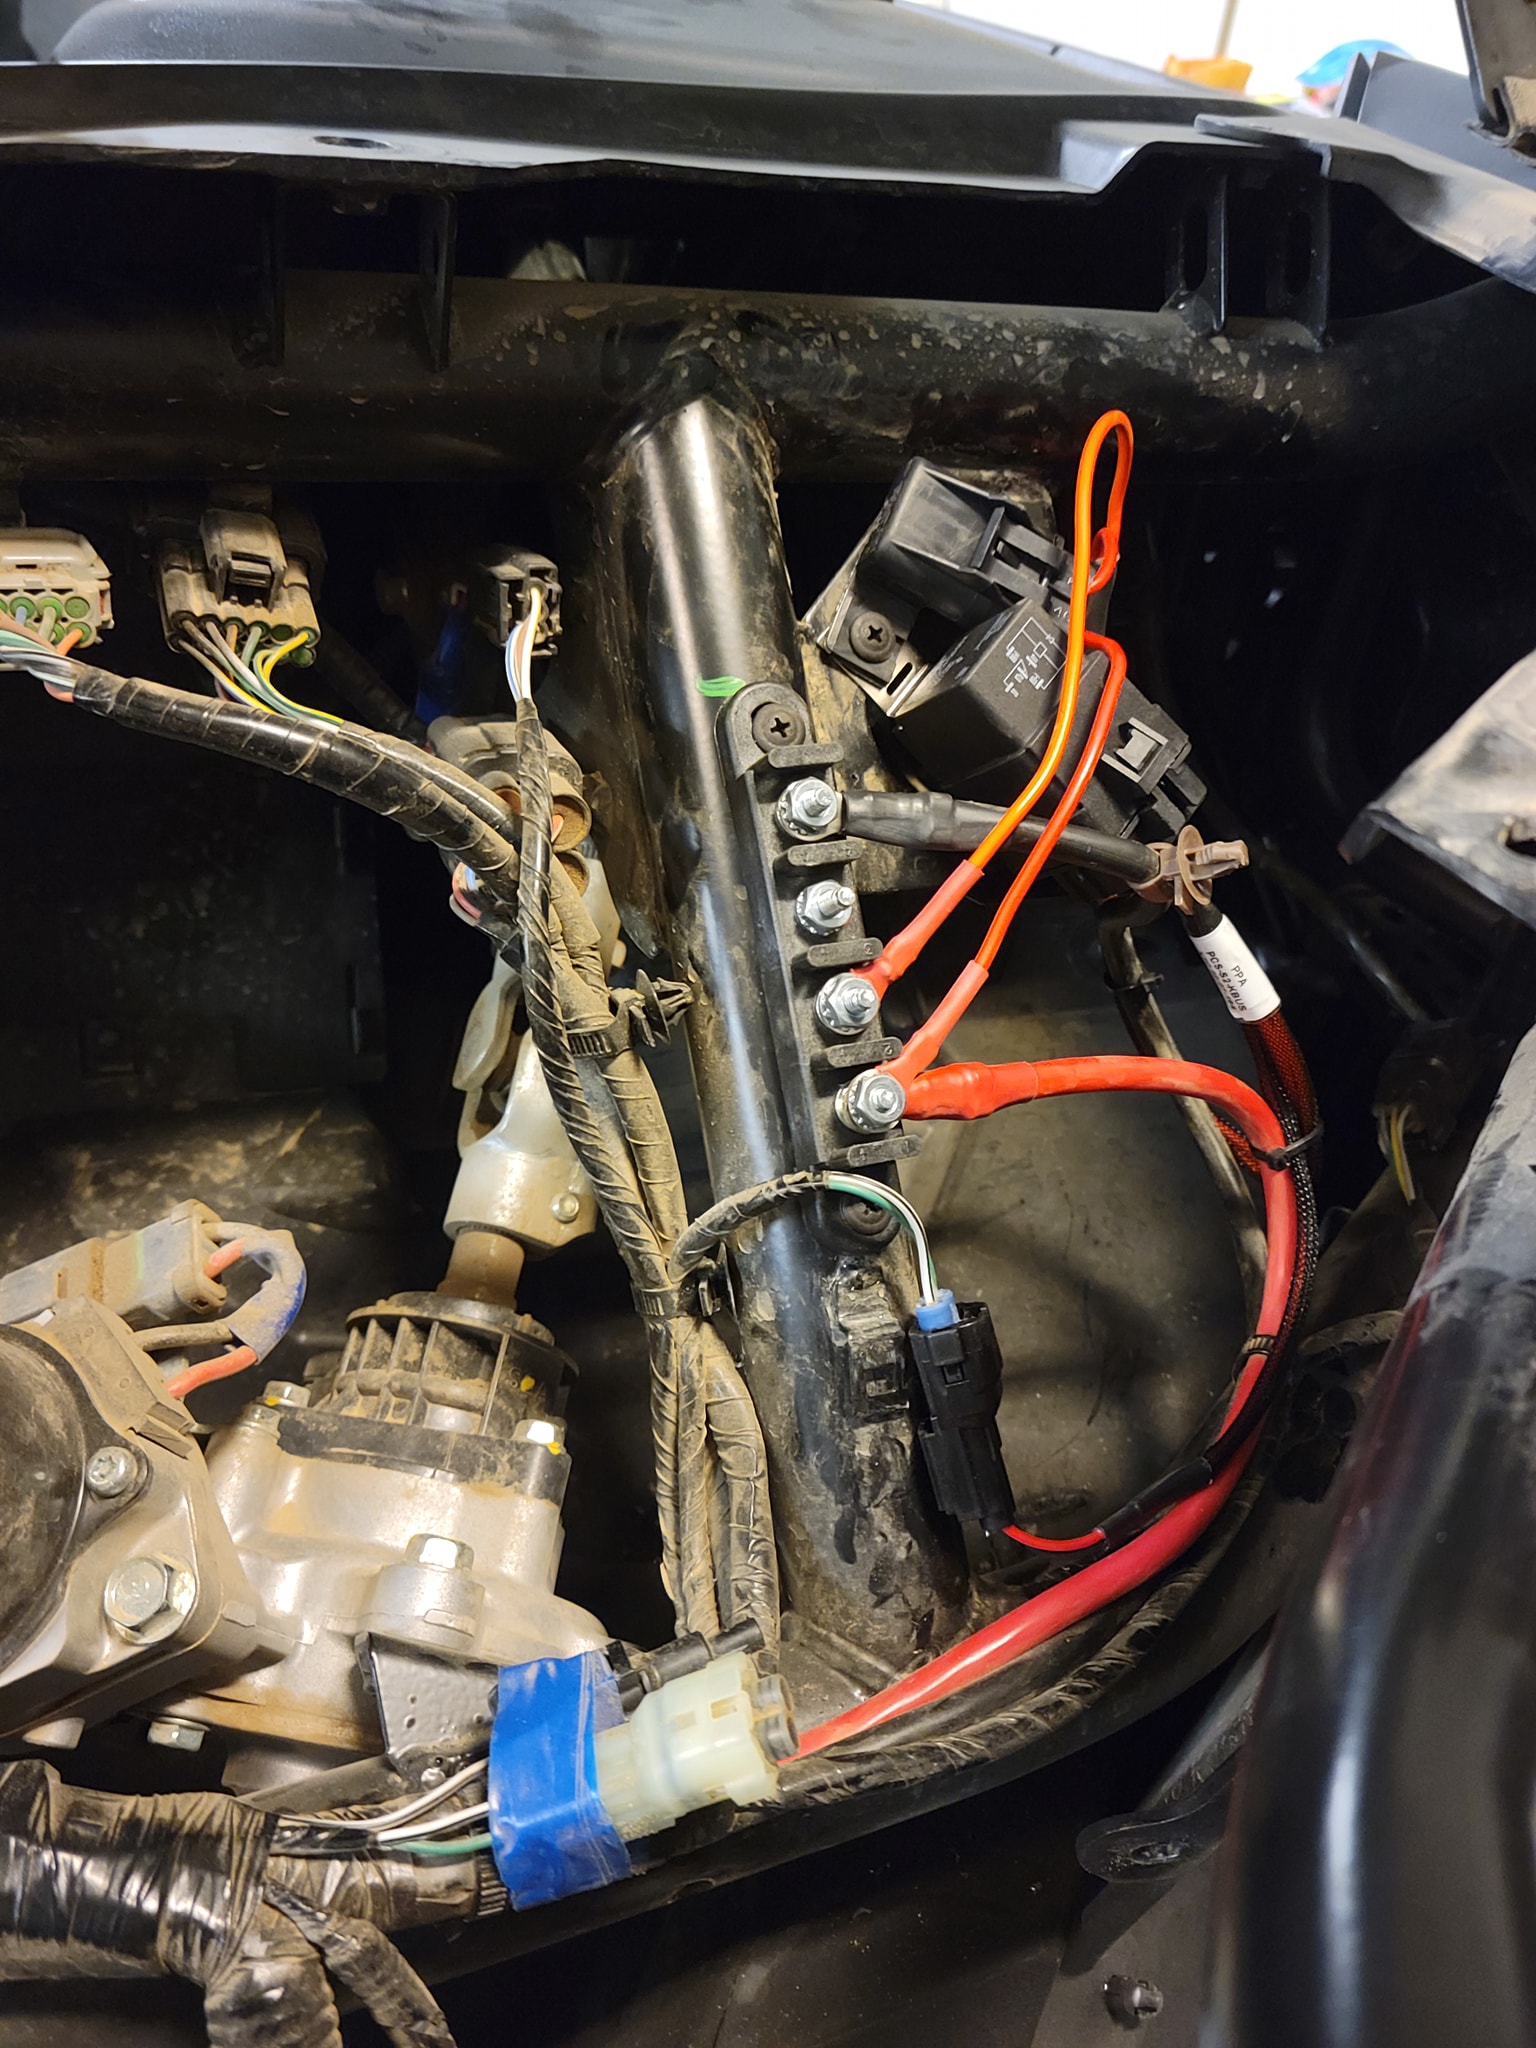
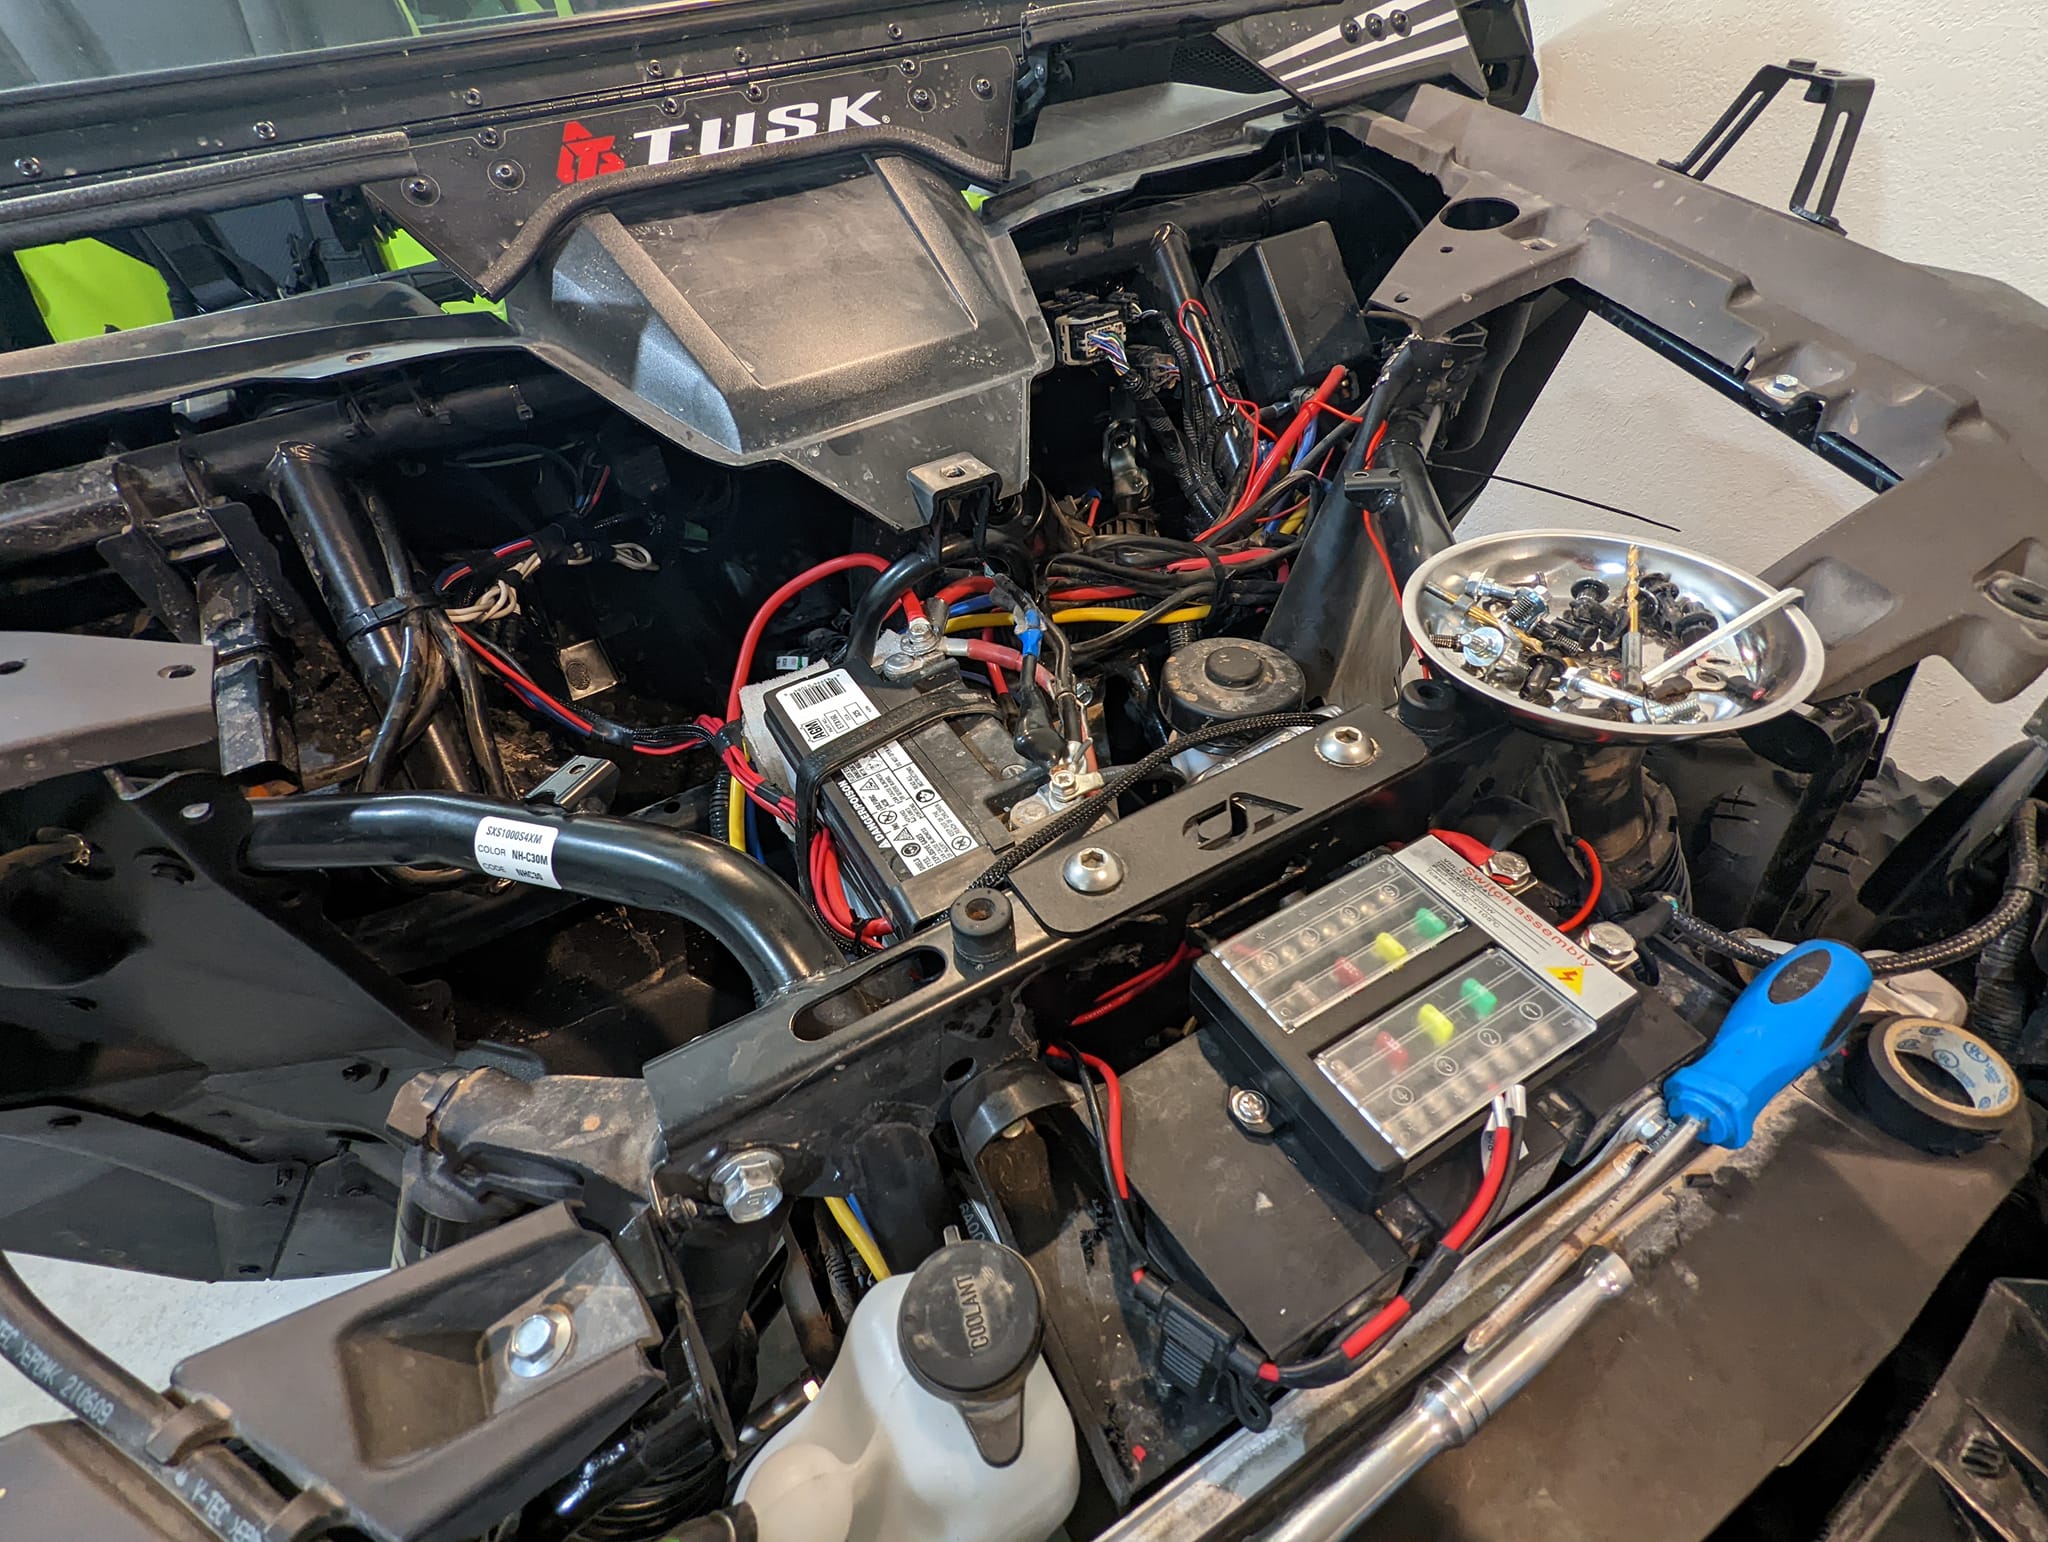
Many Honda Talon owners use the factory winch wire harness to power their aftermarket lights. This is a blue wire plug located at the top right of the frame under the hood. We suggest using the blue factory connector with a relay to power a bus bar, and then pulling your power off that. Accessories like whip lights will be no problem, but if you want to add more accessories, that connector won't be able to handle the amperage. Using a relay, you can turn power on to a busbar that pulls power direct from the battery with a heavy gauge wire. Again, for just low-draw accessories, that setup will work. But if you're planning to add other things down the road, we suggest to just set it up the right way from the beginning and be done with it.
In addition to the blue winch plug, you’ll also find a 4ga red and black wire tucked away in the same corner under the hood. That black wire is the ground wire, while the red wire is the hot wire used for power. Usually, the red wire isn’t connected, so you’ll have to pull the battery box cover and dig out the extra red 4ga wire that is buried behind all the others so that you can connect it to the battery terminal to give it juice.
How To Wire A Honda Talon Light Bar
It’s a good idea to wire high-current-draw accessories directly to the battery, and if you wire your light bar through a switch and an in-line fuse to the battery, you can turn it on to see stuff without having to turn all the systems on with keyed power.
Alternatively, you can also tap into the bright lights under the hood so that when you turn your brights on, your Honda Talon light bar will come on as well. This is a good option for those who want to avoid adding more switches to their machine. Things like lighted mirrors can also be wired to the Talon’s high beams. But if your aftermarket light pulls more than 90 watts, you should opt for a different wiring method.
The safest and most professional way to wire in a Honda Talon light bar is to have it fused and relayed. If you have more than 4 switches, a cheap and easy accessory to install is a 3-, 4-, or 8-gang switch panel that is already fused and relayed.
The Moose Busbar is another great tool for powering aftermarket Honda Talon lights. You typically mount it under the hood / dash, and it can handle up to 35 amps. Plus, because it keeps everything on keyed power, you don’t have to worry about accidentally leaving your accessories on!
Wiring In Multiple Honda Talon Lights
Attaching a fuse box to the aforementioned winch power plug under the hood is an safe and easy way to power multiple lights at once. If you’re also running a winch, you can use the same solenoid for the winch to power your fuse block / bus bar – but this could prove problematic if the light bar is on while you’re pulling hard on the winch. People like running all their accessories through a switched fuse block for two main reasons: you can turn it off with a master switch, and it isolates all the accessories from the OEM wiring should there ever be an issue down the road.
A similar method for achieving a robust electrical system is to clip the factory keyed lead in the corner under the hood, wire in a universal male / female connecter, run that to a universal terminal bar, and then bridge that terminal bar to supply the winch switch and anything else you want to run with the vehicle on. This factory accessory lead is fused, so you don’t have to worry about running relays to avoid melting the ignition switch.
Key Takeaways
Whatever you’re wiring into your machine, aways use relays – or switches / wire harnesses with built-in relays. Your best bet, though, is to get a few bus bars and a relay box. You can use the blue keyed-on power plug under the hood of your Talon for low-draw accessories, but we suggest only using it to activate the coil on the relay or for back lighting on a switch. Also, it’s best to have everything fused for protection. Without fuses, failure from a switch or relay can suddenly melt down your entire system. These are relatively cheap and a pretty simple install, but basic knowledge and the right tools will make it even easier!
Even with fuse boxes and accessory bars, issues can still arise if your electrical draw is greater than the capacity of your battery. So for those with several power-hungry accessories, a dual battery setup is advised. Running accessories off of constant power / straight from the battery can be nice in some instances, but incorporating things like master switches will help you avoid unwanted draw and dead batteries. Fuse panels with master switches or continuous-duty solenoids can be used to manage your accessories, and switch panels with kill power buttons also make it super easy to wire your Honda UTV lights like a professional!